
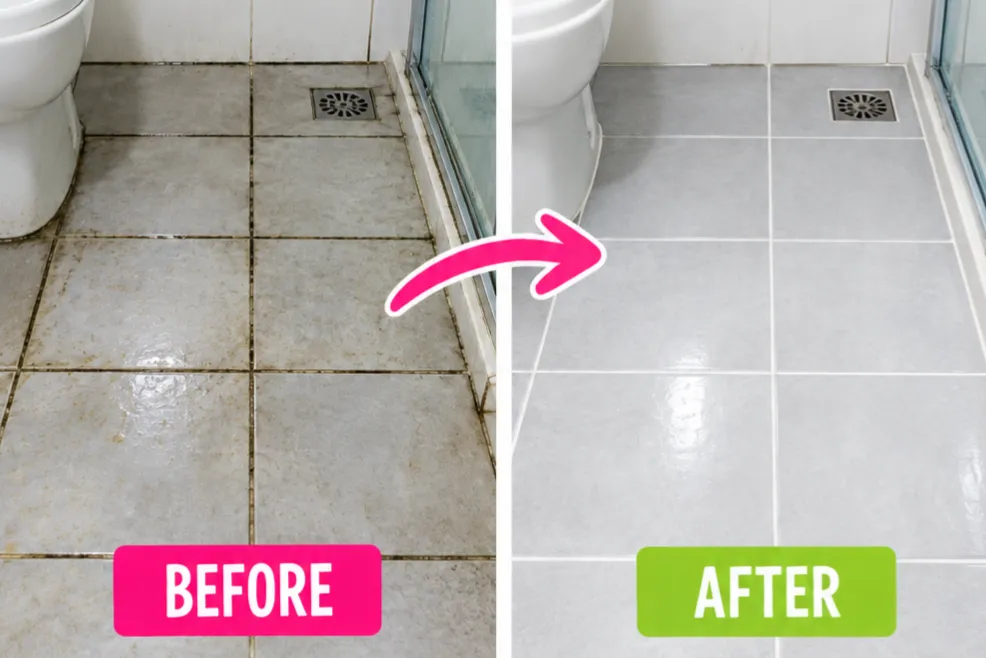
A bathroom floor deals with more moisture, soap residue, and foot traffic than any other floor in the house. Every shower leaves behind water and skin oils that don’t fully dry between uses, which is exactly why bathroom floor tiles dull faster and grout lines darken sooner than floors anywhere else. Even with regular sweeping, buildup tends to creep in around the toilet base and along tile grout without you really noticing until it’s obvious.
The good news is cleaning bathroom floor tiles doesn’t take much, just a bit of care in a room that stays damp longer than most.
If your floor is natural stone, like marble or travertine, skip straight to Method 3. Vinegar’s acidity can etch and dull natural stone over time, so it’s best to avoid it entirely on those surfaces.
Now let’s go through all three methods, step by step.
This post contains affiliate links. If you buy through these links, I may earn a commission at no extra cost to you.
At a Glance: Which Method Do You Need?
- Regular dullness, footprints, or light grime? A vinegar and warm water mop handles it. Head to Method 1.
- Dark grout lines or buildup around the toilet base? A baking soda scrub works through it. Head to Method 2.
- Natural stone floor? A pH-neutral, stone-safe cleaner keeps it safe. Head to Method 3.
Not sure which one you need? Start with Method 1, unless you have natural stone, in which case Method 3 is where to start.
Method 1: Vinegar and Warm Water Mop (For Regular Tile Grime)
This is the routine clean for keeping bathroom floor tiles looking fresh between deeper cleans. It works on most tile, vinyl, and laminate bathroom floors without leaving any residue behind.
Skip this method entirely if your floor is natural stone, head to Method 3 instead.
What You’ll Need
- White vinegar
- Warm water
- A mop or microfiber flat mop
- A bucket
- A dry towel or extra microfiber pad
I usually keep this white vinegar bottle around, it works well and lasts a long time.
How to do it:
Step One: Sweep or vacuum the floor first to clear loose hair, dust, and debris. Skipping this turns your mop water grimy within a couple of passes.
Step Two: Fill a bucket with warm water and add about a half cup of white vinegar. There’s no need for dish soap here, vinegar alone cuts through soap residue and light grime without leaving a film.
Step Three: Mop the tiles in sections, wringing out the mop so it’s damp rather than soaking, standing water is what eventually seeps into grout lines and baseboards.
Step Four: Pay extra attention to the area around the toilet base and the corners near the tub or shower, these spots collect more grime than open floor space.
Step Five: Go over the floor a second time with a mop dampened in plain water to rinse away any leftover vinegar residue.
Step Six: Dry the tiles with a towel or a dry microfiber pad, or leave the exhaust fan running until it air-dries. A wet bathroom floor left standing is exactly how mold gets a foothold.
Method 2: Baking Soda Scrub (For Grout Lines and Toilet Base Buildup)
Use this when the grout between floor tiles has darkened, or when there’s a ring of grime around the base of the toilet that mopping alone doesn’t touch. The mild abrasion in baking soda reaches into grout lines and tight corners without needing anything harsh.
This method isn’t recommended for natural stone, head to Method 3 instead.
What You’ll Need
- Baking soda
- Warm water
- A stiff-bristle grout brush or old toothbrush
- A damp cloth
- Rubber gloves
If your regular sponge can’t get into those narrow grout lines, this stiff-bristle grout brush here makes a real difference, it reaches deep into the grout and holds up to repeated scrubbing much better than a sponge.
How to do it:
Step One: Mix baking soda with a small amount of water to form a thick paste, roughly 3 parts baking soda to 1 part water.
Step Two: Apply the paste directly onto the grout lines and any grimy areas around the toilet base, covering the darkest spots generously.
Step Three: Let it sit for 10 to 15 minutes. For grout that’s been discolored for a while, you can leave it for up to 30 minutes.
Step Four: Scrub with a stiff-bristle brush or old toothbrush, working in small sections along the grout lines and into any corners around fixtures.
Step Five: Wipe away the paste with a damp cloth, then rinse the area with clean water.
Step Six: Dry thoroughly, especially around the base of the toilet, where moisture tends to linger longest.
Method 3: pH-Neutral Stone Cleaner (Safe for Natural Stone Floors)
Natural stone like marble, travertine, and limestone reacts badly to anything acidic, vinegar, lemon, and even some grout cleaners can etch the surface or dull its finish permanently, and once that damage is done, it isn’t reversible with cleaning. A pH-neutral cleaner made specifically for stone avoids that risk entirely while still cutting through everyday grime.
What You’ll Need
- A pH-neutral, stone-safe cleaner
- Warm water
- A soft mop or microfiber cloth
- A dry towel
This pH-neutral stone floor cleaner is formulated specifically to avoid etching, worth keeping on hand if your bathroom floor is natural stone.
How to do it:
Step One: Sweep or vacuum the floor first to clear loose dust, hair, and debris.
Step Two: Dilute the stone-safe cleaner in warm water, following the product’s instructions for ratio, most are fairly concentrated.
Step Three: Mop the floor in sections with a well-wrung mop, avoiding letting water pool on the surface for too long.
Step Four: Pay extra attention to grout lines and the area around the toilet base, where grime tends to build up most.
Step Five: Go over the floor again with a mop dampened in plain water to rinse away any cleaner residue.
Step Six: Dry thoroughly with a towel. Stone floors left to air-dry are more prone to water spots than sealed tile.
Vinyl and laminate floors handle Methods 1 and 2 well, but avoid letting water pool on laminate seams for too long, prolonged moisture can cause warping.
A Quick Habit That Helps a Lot
Keeping a squeegee or towel near the shower to wipe down splashed water before it reaches the floor, and running the exhaust fan for 15 to 20 minutes after every shower, keeps bathroom floor tiles from staying damp long enough for grime and mold to take hold. Most buildup isn’t from one messy day, it’s weeks of moisture that never fully dried between uses.
Whichever method you use, the pattern stays the same, clear the debris, clean with the right solution, then dry thoroughly. Stay consistent with ventilation and quick wipe-downs, and you’ll rarely deal with heavy grout staining or grime buildup at all.